
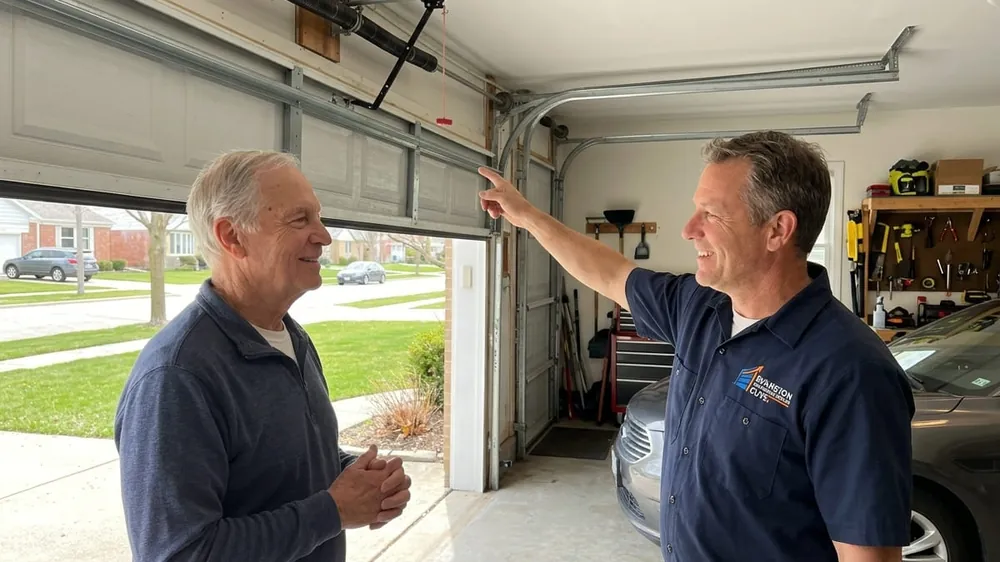
Your garage door is the largest and heaviest moving object in your house. Depending on construction it weighs somewhere between 130 and 400 pounds, it runs on components under enormous stored tension, and most people never look at it properly until the morning it stops working.
This is an inspection routine, not a repair guide. Everything below you can safely look at, listen to or test yourself in about half an hour. Where a point crosses into springs, cables or brackets the instruction is the same: look, note what you saw, and pick up the phone. Nothing here asks you to put a tool on a part under tension.
Why twice a year, and why October and April
Do it in October, before the first hard freeze, and again in April, once the winter is finished with your garage. Those two dates bracket the period that does nearly all the damage here.
NOAA's 1991–2020 climate normals put this area at 121 days a year with a low at or below freezing, 6.5 days at or below 0°F and a snowfall normal of 38.4 inches. Add the road salt — 3,377 tons of granular salt and 52,616 gallons of brine across 190 miles of road in a recent winter — and you have four months in which steel corrodes, grease stiffens and water freezes under the bottom seal.
The October pass catches what will not survive the winter. The April pass finds what the winter did. A door that is going to fail almost always announces it first, and the announcements are visual.
The ground rules before you start
Three things to have settled in your head:
- Looking is safe. Touching some of it is not. Springs, lift cables, bottom brackets and cable drums hold the energy that lifts a quarter-ton door. They are inspected with your eyes only.
- Nobody stands under the door. Not while it is moving, not to get a better look at the top section.
- If something looks wrong, stop using the opener. Running a door with a problem is how a cheap repair becomes a door lying on a car.
You need a torch, a step ladder used beside the door rather than under it, and a length of timber for the reverse test.
Points 1 to 4: the tests you run with the door moving
1. Watch and listen to a full cycle from outside
Stand in the alley or driveway, well clear, and run the door up and down once. Good: steady speed, both sides rising together, a consistent hum and rumble. Bad: a jerk or hesitation at one point in the travel, one side lagging, a bang, a grinding note, a squeal that changes pitch. Uneven travel means the door is binding or the springs no longer match it. Verdict: noise alone is often a roller or lubrication job; uneven travel is a call.
2. The balance test
The single most informative thing on this list. Close the door, pull the emergency release to disconnect the opener, and lift the door by hand to waist height. Good: moderate effort, smooth movement, and it stays where you left it. Bad: it slams down, drifts up on its own, or takes real strength. That is the springs saying they no longer carry the door's weight — so the opener is carrying it instead, which is not what an opener is for. Verdict: a call. Reconnect the opener before you leave.
3. The auto-reverse contact test
Lay a solid object flat on the floor in the door's path — a length of two-by-four is ideal. Never your hand, your foot, or a child's toy. Close the door. Good: it touches the timber, stops and reverses fully open. Bad: it keeps pushing, stops without reversing, or reverses only after a visible struggle. Verdict: a call, and stop using the door meanwhile. Entrapment protection is required by the Consumer Product Safety Commission for a reason.
4. The photo-eye sensor test
The two sensors sit on the vertical tracks facing each other. Start the door closing, then wave a broom handle through the beam. Good: it reverses immediately. Bad: nothing, or a hesitation. Then check the mounting: sensors must be no more than 6 inches above the floor, which is what lets them catch a small child or a pet lying down. Both indicator lights should be steady — a flicker means misalignment. Verdict: realigning and wiping the lenses is fair DIY; a dead sensor, or one mounted high because it kept getting knocked, is a call.
Points 5 to 7: springs, cables and rollers — look only
5. The springs
Look up. A torsion spring sits on a shaft above the opening; extension springs run along the horizontal tracks. Good: continuous, tight, evenly coiled, only light surface colour. Bad: a visible gap in the coil — that is a broken spring, full stop; orange rust bloom, meaning it is corroding and will not reach its rated cycle count; or one extension spring sagging more than its partner. Check too that extension springs have safety containment cables through them, so a break cannot throw the spring across the garage. Verdict: always a call. See spring replacement and why springs break when they do.
6. The lift cables
Follow each cable with your eyes from the bottom bracket up to the drum. Good: tight, straight, uniform, wound neatly. Bad: fraying that looks like a wire brush starting to open up, usually near the drum or the bottom bracket; rust; slack; or cable that has jumped its groove. A frayed cable is the most reliable warning you get before a door drops on one side. Verdict: a call, promptly — cable repair.
7. The rollers
Look at the rollers top to bottom, both sides. Good: turning freely, centred in the channel, stems running straight into the hinges. Bad: chipped or cracked nylon, flat spots, bearings packed with grit, wobble in the stem, or a roller skidding rather than rolling. Worn rollers are the commonest cause of a door that sounds like an approaching train. Verdict: replacement is straightforward on every roller except the bottom one, which sits in the bracket under cable tension — that one is ours.
Points 8 to 11: track, hardware, seal and sections
8. The track
Sight along both vertical tracks. Good: plumb, parallel, evenly spaced from the door, fasteners tight, channel clean. Bad: a lean, a bow, a dent from a bumper, gaps at the mounting brackets, grit in the channel. On an old detached garage a track out of plumb usually means the slab or the frame moved, not the track. Verdict: brush the debris out; anything bent or loose is a call before it becomes an off-track door.
9. Hinges and hardware
Work along the joints between sections. Good: flat hinge plates, tight screws, everything present. Bad: cracked or splayed plates, screw holes elongated into ovals, missing fasteners, a hinge tearing out of the section. Elongated holes mean the door has been fighting something for a long time. Verdict: nip up a loose screw yourself; cracked plates or torn-out holes need a look.
10. Bottom seal and threshold
Squash the bottom seal — the astragal — with your foot. Good: soft and springy, flat on the concrete across its whole width. Bad: hardened, cracked, torn, or gapping at one end. Then look at the slab for a low spot or a stain line where water stands, and at the two bottom brackets for pitting and flaking rust. A door that freezes to the slab in January started as a failed seal in October. Verdict: a seal is reasonable DIY on most doors; the brackets are strictly hands-off.
11. The door sections
Stand back, then look at the back face. Good: flat sections, no daylight through the joints, a straight strut across the top section if one is fitted. Bad: dents deep enough to distort a section, delamination or bubbling on steel, soft or blackened timber on a wood door — check the bottom rail, it always goes first — and any bow across the top section, which usually means the strut is missing, loose or bent. Verdict: cosmetic dents can wait; a bowing top section or a rotted rail cannot.
Point 12: the opener and everything around it
12. The opener, its mounting and its habits
Look up at the rail and motor head. Good: a straight rail solidly braced to the ceiling structure, a tight header bracket, even chain or belt tension, no scorch marks or dangling wires. Bad: a rail flexing as the door runs, a bracket working loose from an old header, a chain slapping the rail, a motor that hums before it moves. Then look around it: the wall control should be at least 5 feet above the floor and out of children's reach, remotes should not live in an unlocked car in the alley, and you should know where the emergency release cord is. Verdict: most of this is opener repair territory; loose fixings on an eighty-year-old header are a structural conversation.
Using the emergency release safely
The red cord disconnects the door from the opener so you can move it by hand. Pull it only with the door fully closed. Pulling it while the door is open — or while a spring is broken — lets the whole weight of the door come down under gravity, with your hands somewhere in that path. If the door is stuck open and something is clearly broken, leave it, keep everyone out from under it, and call.
Children, pets and why the wall control goes high
Most of the serious injuries involving garage doors are not mechanical failures. They are people, usually small ones, in the wrong place.
- The wall control goes at least 5 feet up for one reason: a child pressing a button cannot see the bottom of the door from underneath it. Height is the whole safety mechanism.
- Remotes are not toys. They should not be in a toy box, a school bag or a car left unlocked on an alley — that last one is a break-in waiting for somebody with an afternoon free.
- Nobody walks under a moving door, and nobody races it. It is a very old game and it is how fingers and heads get caught.
- Fingers go in the handles, not the section joints. A closing door pinches hard at every joint; pinch-resistant sections exist for exactly that.
- A door that reverses late is a genuine hazard, not a minor annoyance. Late reversal on a 300-pound door still delivers a serious impact before it changes direction. That is why point 3 gets done every six months.
The CPSC publishes the entrapment-protection background, and DASMA's guidance on door systems plus its technical data sheets for residential doors set out what a correctly working system should do. Both are worth ten minutes.
What not to touch, and what actually happens if you do
No lecture, just the failure modes.
- Torsion springs. The spring above your door holds hundreds of pounds of stored torque. Loosen a set screw without winding bars in place and it releases in a fraction of a second, sending the bar or the shaft wherever the energy takes it.
- Extension springs. Stretched along the horizontal tracks, they store the same energy in a straight line. When one breaks it whips. The containment cable is what stops it crossing the garage, which is why point 5 checks for one.
- Cable tension and drums. Unwinding a drum, or slackening a cable to even the door up, drops the load onto one side. The door racks and can come off the track while you stand there.
- Bottom brackets. The single most misjudged part on a garage door. The lift cable terminates there, so those bolts are under full spring tension even with the door closed. People undo them to fix a bottom seal. The bracket then leaves the door at speed.
- Opener force adjustments. Turning the force up to push a sticking door through its bind disables the auto-reverse you just tested, and hides a mechanical problem that is still getting worse underneath.
The twelve-point checklist
Print this and keep it in the garage — October and April
- 1. Full cycle, watched from outside — steady speed, both sides level, no bang or grind
- 2. Balance test — release the opener, lift to waist height, it should stay put
- 3. Auto-reverse — timber flat on the floor, door must touch and reverse
- 4. Photo-eyes — beam broken mid-close reverses the door; sensors 6 in or lower, lights steady
- 5. Springs (look only) — no gap in the coil, no rust bloom, no sag; containment cables on extension springs
- 6. Cables (look only) — no fraying at the drum or bottom bracket, no slack, wound neatly
- 7. Rollers — turning freely, no cracks, flat spots or wobbling stems
- 8. Track — plumb, parallel, fasteners tight, channel clear of grit
- 9. Hinges and hardware — no cracked plates, no elongated screw holes, nothing missing
- 10. Bottom seal and threshold — seal still soft and flat, no standing water, brackets not pitted
- 11. Sections — no distorting dents, no delamination or rot, top strut straight
- 12. Opener and surroundings — rail braced, wall control 5 ft up, remotes secured, release cord known
What actually warrants a call
Out of twelve points, four are always a call regardless of how mild they look: a failed balance test, a failed auto-reverse, anything visibly wrong with a spring, and any fraying on a cable. Those four are the ones that turn into a door coming down.
Everything else is a judgement call, and most of it can honestly wait for the next service. If you are in south Evanston or north Evanston and something looked wrong, ring (224) 505-2236 and describe it — we will say on the phone whether it is urgent or whether it can sit until spring, and we would rather say the second if it is true. Garage door repair and noise diagnosis both start with these same twelve points. You have done the first pass yourself.
Frequently asked questions
How long does this inspection actually take?
About half an hour the first time, and fifteen minutes once you know what you are looking at. The moving tests — the full cycle, the balance test, the auto-reverse and the photo-eyes — take five minutes between them. The rest is walking the door with a torch, top to bottom, both sides. If you have never done it, budget the full half hour for the first pass in October and write down what you saw, because next April the comparison is what tells you whether something is getting worse.
My door fails the balance test. Can I adjust the springs myself?
No. A failed balance test means the springs are no longer carrying the door's weight, and correcting that means changing the tension in a component holding hundreds of pounds of stored energy. Torsion springs are wound with two bars and a specific technique; extension springs are under the same load in a straight line. Getting it wrong takes fingers off. In the meantime, use the door as little as you can — an unbalanced door makes the opener carry weight it was never designed to lift, and you will be replacing the opener too.
How high should the photo-eye sensors be mounted?
No more than 6 inches above the floor, on both vertical tracks, facing each other. That height is not arbitrary — it is what allows the beam to detect a small child or a pet lying in the doorway. We regularly find sensors that somebody has moved up to knee height because they kept getting knocked out of alignment by bikes or bins. A sensor at knee height passes the broom-handle test and still misses the thing it exists to catch. If yours are high, they need remounting and the real problem — usually where things get stacked — needs solving.
Is it safe to pull the emergency release cord?
With the door fully closed, yes, and you should know how before you need to. With the door open, no. The release disconnects the door from the opener, so an open door held up only by a spring system that may be the thing that failed will come down under its own weight once the trolley lets go. Pull it closed, keep everyone out from under the door, and if the door is stuck open with something obviously broken, leave it and call rather than experiment.
What counts as an emergency and what can wait until spring?
Four things are always urgent: a failed balance test, a failed auto-reverse test, any visible gap or break in a spring, and fraying on a lift cable. Those are the faults that end with a door coming down. A noisy door, a hardened bottom seal, a cosmetic dent, grit in the track or a roller that has seen better days can generally wait for a scheduled visit. If you are unsure which category you are in, describe it on the phone — that conversation costs nothing and we would rather tell you it can wait.
Does an unheated detached garage need checking more often?
Twice a year still covers it, but the April pass matters more than it does on an attached garage. A detached garage sits at outdoor temperature all winter with road salt tracked in on your tyres, so the springs, rollers, cable drums and bottom brackets spend four months in a damp, saline film. Corrosion is what turns a spring rated for a certain number of cycles into one that fails early. Look hardest at the coil surfaces, the cable ends and the bottom brackets when the snow has gone.
Nate Sorensen
Nate grew up in south Evanston behind a detached alley garage and has been in the garage door trade since his late teens. He co-founded Evanston Garage Door Repair Guys with Chris Duvall in 2011 and still runs the residential calls.